


Ever scrolled through listings and wondered why some properties look incredible and sell in a weekend, while others just sit? It's not always the house—it's the photography.
Want to work with me? Book your FREE photography consultation here: ➡️ https://www.cineminn.com/photography-consultation
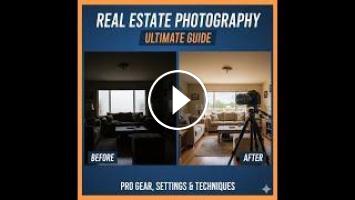
In this complete guide, we're pulling back the curtain on the professional's playbook. You'll learn how to stop taking simple pictures of a house and start crafting a story that sells a home. We cover the exact gear, non-negotiable camera settings (like aperture and ISO), and simple on-site habits that make a huge difference—like what to turn ON and what to turn OFF.
Learn the techniques to create warm, welcoming images that make someone fall in love with a property before they even step inside.
???? What's Inside This Tutorial:
(Copy & paste these timestamps into your description)
00:00 - The "Secret Sauce" That Sells a House
Why pro photos make a house sell faster.
It's not about the house; it's about the craft.
00:50 - The Pro's Playbook: Prep & Gear
How to get that polished, professional look.
Essential Gear: DSLR/Mirrorless, 16-35mm wide-angle lens, and a stable tripod.
01:24 - Pro-Level Camera Settings (The Formula)
Why pros work to a high standard.
Aperture: Set to f/8 - f/11 for edge-to-edge sharpness.
ISO: As low as possible for clean, noise-free images.
White Balance: Set it and forget it.
01:49 - PRO TECHNIQUE: Bracketing Explained
How to get a perfect exposure every time.
Take 5 shots at different brightness levels (dark, bright, and in-between).
Blend them later to avoid blown-out windows and dark shadows.
02:30 - On-Site Habits for a Pro Shoot
Habit 1: Turn ON All The Lights (lamps, under-cabinet, etc.) for a welcoming glow.
Habit 2: Turn OFF All The Fans (CRITICAL) to prevent motion blur during bracketing.
Habit 3: Open Every Curtain & Blind to show the view and make rooms feel bigger.
Habit 4: Open Interior Doors to create flow and invite viewers in.
Habit 5: Include Hallways in your shot to add depth and show the home's layout.
03:55 - The #1 Rookie MISTAKE to Avoid
Why you must STOP shooting from the doorway.
Take two steps into the room to make the photo immersive.
04:16 - Pro Exterior Tips
Tip 1: Raise your tripod to shoot OVER ugly street gutters.
Tip 2: Use landscaping (leaves, branches) to frame your shot and add depth.
05:06 - How to Tell a Story with Your Shots
Don't just dump photos; build a narrative.
The 3 Shots You Need for Every Room:
1. The Overview (Wide shot to show size and layout).
2. The Mid-Range (Your "hero" shots of features like islands or fireplaces).
3. The Detail Shot (Close-ups that sell the lifestyle and create mood).
06:21 - What You MUST Shoot (And What to SKIP)
Must-Shoot List: Front Exterior, Kitchen, Living Room, Primary Bedroom, Backyard.
What to Skip: Garage, pantry, closets, laundry room.
Your job is to be a curator, not a documentarian.
06:51 - Final Thoughts: Selling the Dream
Book your FREE consultation to level up your property listings: https://www.cineminn.com/photography-consultation
#realestatephotography #photographytutorial #realestate #camerasetting #nikon #canon #sony #photographyforbeginners
Want to work with me? Book your FREE photography consultation here: ➡️ https://www.cineminn.com/photography-consultation
In this complete guide, we're pulling back the curtain on the professional's playbook. You'll learn how to stop taking simple pictures of a house and start crafting a story that sells a home. We cover the exact gear, non-negotiable camera settings (like aperture and ISO), and simple on-site habits that make a huge difference—like what to turn ON and what to turn OFF.
Learn the techniques to create warm, welcoming images that make someone fall in love with a property before they even step inside.
???? What's Inside This Tutorial:
(Copy & paste these timestamps into your description)
00:00 - The "Secret Sauce" That Sells a House
Why pro photos make a house sell faster.
It's not about the house; it's about the craft.
00:50 - The Pro's Playbook: Prep & Gear
How to get that polished, professional look.
Essential Gear: DSLR/Mirrorless, 16-35mm wide-angle lens, and a stable tripod.
01:24 - Pro-Level Camera Settings (The Formula)
Why pros work to a high standard.
Aperture: Set to f/8 - f/11 for edge-to-edge sharpness.
ISO: As low as possible for clean, noise-free images.
White Balance: Set it and forget it.
01:49 - PRO TECHNIQUE: Bracketing Explained
How to get a perfect exposure every time.
Take 5 shots at different brightness levels (dark, bright, and in-between).
Blend them later to avoid blown-out windows and dark shadows.
02:30 - On-Site Habits for a Pro Shoot
Habit 1: Turn ON All The Lights (lamps, under-cabinet, etc.) for a welcoming glow.
Habit 2: Turn OFF All The Fans (CRITICAL) to prevent motion blur during bracketing.
Habit 3: Open Every Curtain & Blind to show the view and make rooms feel bigger.
Habit 4: Open Interior Doors to create flow and invite viewers in.
Habit 5: Include Hallways in your shot to add depth and show the home's layout.
03:55 - The #1 Rookie MISTAKE to Avoid
Why you must STOP shooting from the doorway.
Take two steps into the room to make the photo immersive.
04:16 - Pro Exterior Tips
Tip 1: Raise your tripod to shoot OVER ugly street gutters.
Tip 2: Use landscaping (leaves, branches) to frame your shot and add depth.
05:06 - How to Tell a Story with Your Shots
Don't just dump photos; build a narrative.
The 3 Shots You Need for Every Room:
1. The Overview (Wide shot to show size and layout).
2. The Mid-Range (Your "hero" shots of features like islands or fireplaces).
3. The Detail Shot (Close-ups that sell the lifestyle and create mood).
06:21 - What You MUST Shoot (And What to SKIP)
Must-Shoot List: Front Exterior, Kitchen, Living Room, Primary Bedroom, Backyard.
What to Skip: Garage, pantry, closets, laundry room.
Your job is to be a curator, not a documentarian.
06:51 - Final Thoughts: Selling the Dream
Book your FREE consultation to level up your property listings: https://www.cineminn.com/photography-consultation
#realestatephotography #photographytutorial #realestate #camerasetting #nikon #canon #sony #photographyforbeginners
- Catégories
- Photographie Immobilière
Ajouter un commentaire
Up Next
Autoplay
-
00:29

Shoot Like a Pro: Real Estate Camera Settings Revealed! ????
-
00:48
Real Estate Photography Tripod Guide: Affordable Quality with the Dahlika Pro Line
-
00:56
Ultimate Guide to Real Estate Photography with Envision Media
-
00:48
Real Estate Photography Tripod Guide: Affordable Quality with the Dahlika Pro Line
-
00:50
Real Estate Photography: Tips, Tricks, and Techniques for Pro Level Photos
-
00:56
Pro Real Estate Photo Techniques
-
00:46
The Ultimate Guide to Camera Settings for Real Estate Video ✅
-
00:30
Marketing Mastery: The Ultimate Guide for Real Estate Agents | Real Estate Brokers #shorts
-
00:51
Real Estate Photography: How to Use Pro Settings for Amazing Results ????
-
01:19
Real Estate Photography Gear Guide: The Best Ultra-Wide Lenses
-
07:59

Immobilier: Que faut-il regarder pour acheter un appartement?
-
02:31

Installation d’un studio NATIBOX pour location saisonnière
-
04:11

Acheter un appartement - Guide Fr Final Fantasy XIV
-
06:49

Visite d'appartement | Picassent | Valence | 75.000 € | 122 m2
-
00:46

Que vérifier avant d'acheter un appartement ?
-
00:39
BRIGNAIS - APPARTEMENT A VENDRE - 262 500 € - 43 m² - 2 pièce(s)
-
00:49
NICE - APPARTEMENT A VENDRE - 435 000 € - 50 m² - 3 pièce(s)
-
00:54
PARIS 15ÈME - APPARTEMENT A VENDRE - 1 216 800 € - 102 m² - 5 pièce(s)
-
1:53:17

COMMENT J’ACHÈTE GRATUITEMENT UN APPARTEMENT - À DUBAI
-
20:01
ACHAT 1ER APPARTEMENT (ikea,babou,action,boulanger,but)
Commentaires