


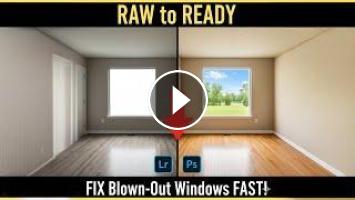
Ever wonder how pro photographers get those bright, vibrant real estate photos where the room is perfectly lit AND the view outside the window is crystal clear? It's not magic, it's a repeatable workflow.
In this tutorial, we pull back the curtain on the exact 7-step process we use to transform a single, "boring" RAW file into a dynamic, client-ready image that pops off the screen and helps sell listings faster.
You will learn:
The "non-negotiable" first step before you touch any slider
How to fix dark corners and "blown-out" white windows
The pro technique for getting perfectly straight vertical lines
How to use "bracketing" and LR/Infuse for a natural-looking blend
Using the HSL panel for surgical control over colors (like grass and interior lights)
The Photoshop "Window Pull" trick using the 'Darken' blend mode
How to magically remove scuff marks and power cords with Content-Aware Fill
➡️ ARE YOU A REALTOR IN MINNESOTA?
Stop wasting time editing photos. Cineminn Media Co. (founded by a 9-year MN Realtor ) delivers stunning, client-ready photos, videos, Matterport tours, and floor plans—so you can focus on what you do best: closing deals.
We know what Minnesota agents need. Book your first listing today: https://www.cineminn.com
TIMESTAMPS: 0:00 - The "Before & After" Transformation 0:53 - Step 1: The "Ruthless" Culling Process (Organization) 1:40 - Step 2: The Lightroom Foundation (DO THIS FIRST!) 1:55 - The Most Important Setting: White Balance 2:08 - Basic Panel Workflow (Exposure, Highlights, Shadows) 2:30 - The "Pro Architectural Look" (Lens & Vertical Corrections) 3:04 - Step 3: How to Fix Blown-Out Windows (Bracketing) 3:40 - Pro Tip: Using LR/Infuse for Natural Blending 4:23 - Step 4: Fine-Tuning Color (HSL Panel) 5:01 - Step 5: Targeted Lighting (Masking Tools) 5:26 - Step 6: The Photoshop Polish 5:36 - "Window Pull" Technique (Darken Blend Mode) 6:02 - Magically Remove Distractions (Content-Aware Fill) 6:22 - Step 7: Exporting for Web vs. Print 7:00 - The 3 Key Takeaways
- Catégories
- Photographie Immobilière
Ajouter un commentaire
Up Next
Autoplay
-
00:13

Elevate Your Real Estate Listings with Stunning Photo Enhancements
-
05:54
Real Estate Photo Editing Process in Photoshop 2025
-
01:17
Easy Lightroom Editing for Real Estate Photography.
-
10:26
Hidden Photoshop Settings for Real Estate Photo Editing
-
00:29
Benefits of Professional Real Estate Photo Editing. #realestate #edit #editing #photoshop #shorts
-
00:09
Photo editing sample. Fiona and Finn Real Estate Photo Editing
-
09:14
How To Edit Real Estate Photos in 2025 | Lightroom + Photoshop Tutorial |
-
06:18
Easy Photoshop Sky Replacement | Real Estate Photo Editing Tutorial
-
00:42
Why Adobe Lightroom Is Still the Best for Real Estate Photo Editing.
-
06:12
Real Estate Interior HDR Photo Editing in Photoshop A Step-by-Step Tutorial |
-
07:59

Immobilier: Que faut-il regarder pour acheter un appartement?
-
02:31

Installation d’un studio NATIBOX pour location saisonnière
-
04:11

Acheter un appartement - Guide Fr Final Fantasy XIV
-
06:49

Visite d'appartement | Picassent | Valence | 75.000 € | 122 m2
-
00:46

Que vérifier avant d'acheter un appartement ?
-
00:39
BRIGNAIS - APPARTEMENT A VENDRE - 262 500 € - 43 m² - 2 pièce(s)
-
00:49
NICE - APPARTEMENT A VENDRE - 435 000 € - 50 m² - 3 pièce(s)
-
00:54

PARIS 15ÈME - APPARTEMENT A VENDRE - 1 216 800 € - 102 m² - 5 pièce(s)
-
1:53:17

COMMENT J’ACHÈTE GRATUITEMENT UN APPARTEMENT - À DUBAI
-
20:01

ACHAT 1ER APPARTEMENT (ikea,babou,action,boulanger,but)
Commentaires